
Oct 17, 2026 · 3,852 words
Google Search Console for Beginners: 30‑Minute Checklist
You don’t need an SEO degree to get value from Google Search Console today. You need a clear path, 30 minutes, and the right export. If you’ve wondered how to…

You don’t need an SEO degree to get value from Google Search Console today. You need a clear path, 30 minutes, and the right export. If you’ve wondered how to use Google Search Console for beginners to see what pages are helping or hurting your traffic—and send useful instructions to a freelancer—this guide is for you.
We’ll set up your property, submit a sitemap, run one specific performance comparison to find “lost clicks,” export the exact columns a pro needs, and share access safely. No rabbit holes, no jargon you can’t act on.
Read with your site open. You’ll be done in half an hour, faster if you already have access.
Key takeaways (read first)
- In 30 minutes you can: add and verify your site, submit a sitemap, run a clicks-lost report, and export an actionable CSV for a freelancer.
- You’ll get: which pages and queries lost clicks period-over-period, plus impressions, click-through rate (CTR), and average position.
- Your one export: a CSV/Sheet with clicks, impressions, CTR, avg. position, page, query, country, device for a set date comparison.
- If you’re outsourcing: send the export plus a short brief (template below); give “Viewer” access first, then upgrade permissions if needed.
- Ignore for now: deep Core Web Vitals analysis, Enhancement details, and inspecting every single URL—focus on the Performance report first.
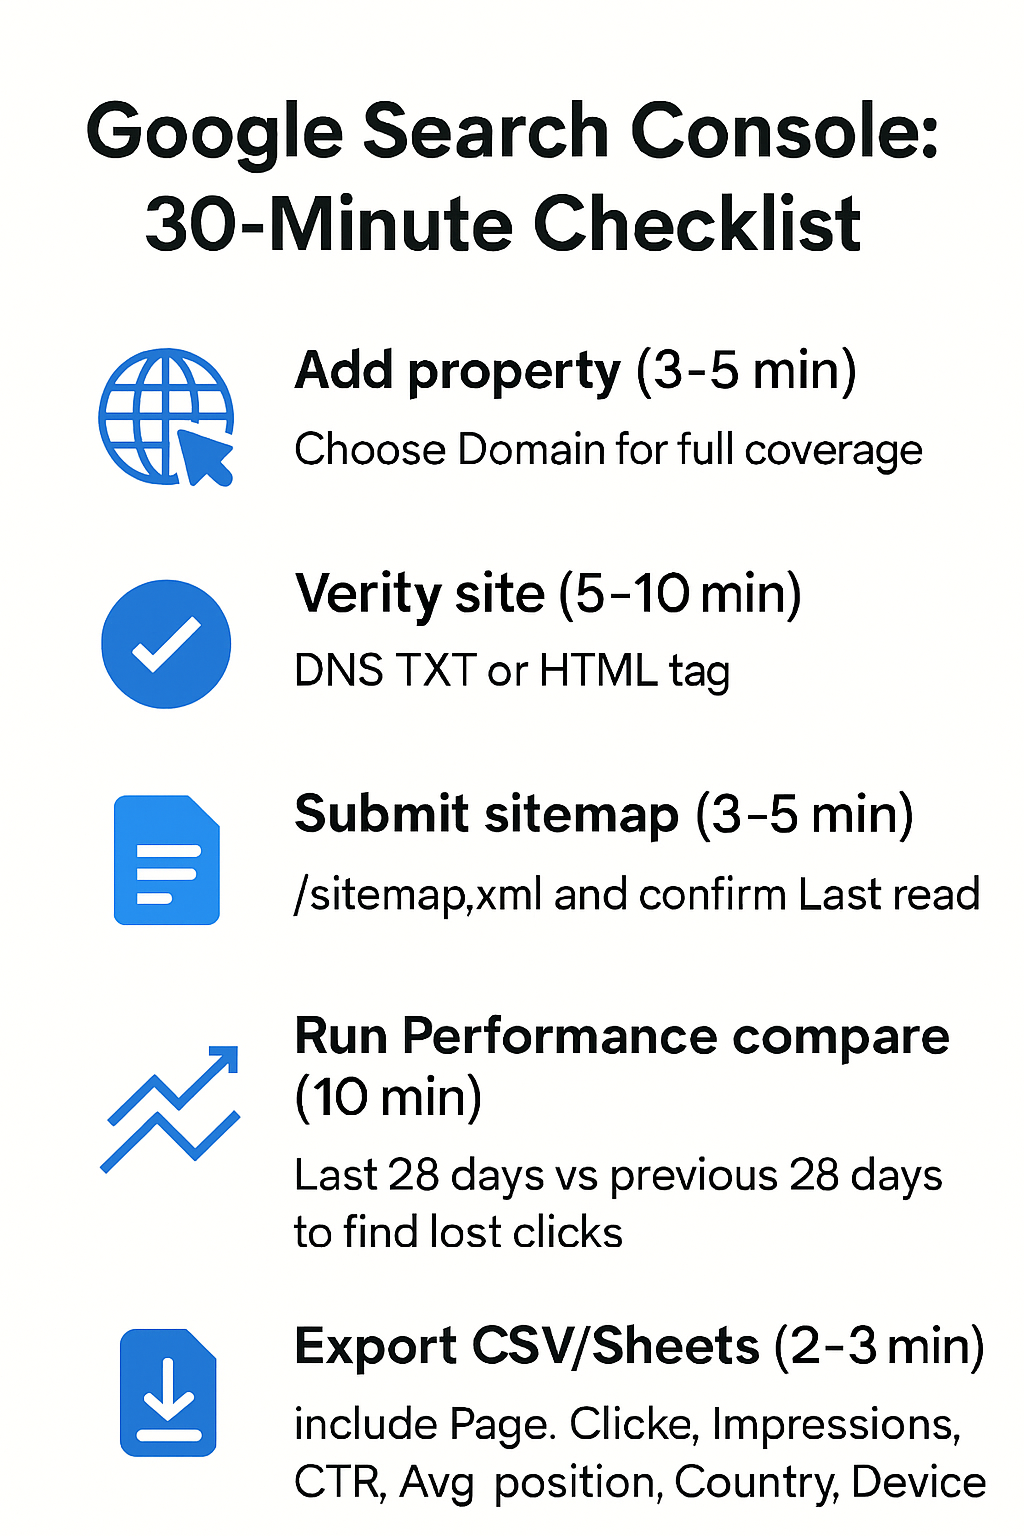
How to use Google Search Console for beginners — the 30‑minute checklist
Follow this sequence; times are realistic for a small site. Cost notes explain how you might outsource each task without guessing at prices.
- Add a property (3–5 minutes)
- DIY: Free.
- Outsourcing: Include in a fixed-scope “GSC setup” task; no need for hourly creep.
- Verify your site (5–10 minutes)
- DIY: Free; if you control DNS or the CMS, it’s quick.
- Outsourcing: A developer or SEO can do this in a short task; ask for “verification documented.”
- Add your sitemap (3–5 minutes)
- DIY: Free; most CMSs auto-generate it.
- Outsourcing: Add to the same setup task; ask for confirmation screenshot.
- Run the Performance report comparison and spot “lost clicks” (7–10 minutes)
- DIY: Free; steps below.
- Outsourcing: Include the exact date ranges and filters you want; ask for before/after screenshots.
- Export the data (2–3 minutes)
- DIY: Free; CSV or Google Sheets.
- Outsourcing: Make the export format and columns mandatory.
- Share safely (2–3 minutes)
- DIY: Free; use “Users and permissions.”
- Outsourcing: Start with “Viewer” access; upgrade if the freelancer needs to annotate.
- Quick triage of what to fix first (5 minutes)
- DIY: Use the rules below to pick 3–5 pages.
- Outsourcing: Prioritize pages in your brief; set a one-week check‑in.
According to Google Search Console Help, you need to add and verify ownership before you can see data and use tools that affect how your site appears on Google. Moz and Yoast both emphasize the initial setup—choosing property type and verification—as the gateway to everything else.
Step 1 — Choose a GSC property: Domain vs URL-prefix
When you add a site in GSC, you’ll be offered two property types: Domain and URL-prefix.
- Domain property: covers all subdomains and protocols (http/https, www/non‑www, m. etc.).
- URL-prefix property: covers only that exact prefix (for example, https://www.example.com/).
For most small businesses, a Domain property is the long‑term default because it captures everything in one view. If you’re in a hurry and only want to analyze one specific section (like /blog/), a URL-prefix property is fine for quick checks.
Comparison: which property should you pick first?
| Property type | What it includes | Pros | Cons | Setup time | When to use first |
|---|---|---|---|---|---|
| Domain | All subdomains and protocols | One dashboard for entire site; future‑proof | Requires DNS access to verify | ~5–10 minutes | Most businesses; standard setup |
| URL-prefix | Only the exact prefix you enter | Fast to verify; granular (e.g., /shop/, /blog/) | Easy to miss data on other versions | ~2–5 minutes | Quick audits, section-only analysis |
Domain vs URL-prefix: practical examples
- You own example.com and use https://www.example.com for your main site. You also have a staging site at https://staging.example.com and sometimes people link to http://example.com. Choose Domain to see it all in one place.
- You run a store at https://www.example.com/shop and a separate blog at https://www.example.com/blog, and you only want to compare blog posts. Choose URL-prefix for https://www.example.com/blog/ to focus your analysis.
- You inherited a site and aren’t sure which version Google recognizes. Add a Domain property to avoid missing data across www vs non‑www or http vs https.
Step 2 — Verify your site (DNS, HTML file, tag, or CMS plug‑in)
Verification proves you control the site. Google’s help docs list multiple methods; here’s how to pick:
DNS TXT record (Domain property)
- Steps: In your domain registrar (e.g., where you bought your domain), add the TXT record GSC gives you. Save, then click Verify in GSC.
- Time: 5–10 minutes; propagation can take longer depending on your provider.
- Use when: You want full coverage across all subdomains/protocols.
HTML file upload (URL-prefix)
- Steps: Download the HTML verification file from GSC, upload to your site’s root folder, then click Verify.
- Time: 3–5 minutes if you have file access.
- Use when: You or your dev can FTP/SFTP quickly.
HTML tag (URL-prefix)
- Steps: Copy the meta tag from GSC and paste it into the of your homepage template; publish, then Verify.
- Time: 3–5 minutes on most CMSs.
- Use when: You can edit site header easily.
Google Analytics or Tag Manager (URL-prefix)
- Steps: Choose GA or GTM verification in GSC; it checks for an existing container or GA tag on your site.
- Time: 2–3 minutes if those tools are already installed.
- Use when: You already have GA/GTM and stable access.
WordPress and other CMS plug‑ins (URL-prefix)
- Steps: Many SEO plugins (e.g., the well‑known options) offer a paste‑your-code field; paste the meta tag and save.
- Time: 3–5 minutes.
- Use when: You prefer no-code verification.
Common verification errors and quick fixes:
- Record not found: Wait a bit longer or confirm you added the TXT at the root domain level, not a subdomain.
- Tag not detected: Make sure the tag is in the live , not inside a builder “HTML” block that loads after the page.
- File upload fails: Confirm the file name and path are exact (case-sensitive) and that your server returns a 200 OK for that URL.
- Mixed versions: If you verified a URL-prefix on http:// but your site redirects to https://, add/verify the https:// version.
Step 3 — Add a sitemap and why it matters
A sitemap is a simple XML file that lists URLs you want indexed. It helps Google discover pages more reliably, especially on new or changing sites. Google’s own docs position sitemaps as useful for larger or newer sites; for most small businesses with a CMS, submitting one is still a quick, good practice.
How to find your sitemap:
- Try common paths: /sitemap.xml or /sitemap_index.xml.
- WordPress with common SEO plugins often uses /sitemap_index.xml.
- Shopify usually generates at /sitemap.xml.
- If you can’t find it, search your CMS docs for “sitemap” or enable it via your SEO plugin/module.
How to submit in GSC:
- Open Search Console > Sitemaps in the left menu.
- In “Add a new sitemap,” paste the path (e.g., sitemap.xml) and Submit.
- You’ll see “Success” or an error; refresh to confirm “Last read” appears.
What to expect next:
- The sitemap status updates in GSC once Google reads it.
- Indexing doesn’t happen instantly. Check the Indexing reports in a few days to see how many submitted URLs are indexed.
- If your sitemap shows errors, click through to see invalid URLs or formatting issues; fix in your CMS or plugin and resubmit.
Step 4 — Run the Performance report: exact clicks‑lost query
This is the most valuable 10 minutes you’ll spend: find pages that lost clicks so you know what to fix or outsource. The Performance report shows clicks, impressions, CTR, and average position from Google Search. Data isn’t real‑time, so use completed recent periods.
Recommended comparison:
- Compare the last 28 days to the previous 28 days for a steady picture.
- For seasonal businesses, compare the same period year‑over‑year once you have history.
Interpretation tips:
- Look for pages with a noticeable drop in clicks but stable impressions—your titles/descriptions may need tuning.
- Look for pages with drops in both clicks and impressions—competitors may be outranking you, or search demand dipped.
- Don’t chase minor variations on low‑impression pages; focus on material changes.
Performance report — exact UI steps and filters
Use these steps so your export is ready for a freelancer without rework:
- Open GSC > Performance > Search results.
- At the top, enable the checkboxes for Total clicks, Total impressions, Average CTR, and Average position.
- Click the Date filter > Compare > set “Last 28 days” vs “Previous period.” Apply.
- Click the “Pages” tab below the chart.
- Click the Columns or “+ New” filter if needed, but for now we’ll keep all queries/devices/countries.
- Click the small down arrow on Clicks to sort by “Difference” (descending). If the UI doesn’t show a diff toggle, export first (next step) and sort by Clicks difference in your spreadsheet.
- Scan the list for pages with the largest negative change in clicks.
- Click a specific page to drill down; then click the “Queries” tab to see which queries lost clicks for that page.
- Optional: Add a filter for Country (e.g., your main market) or Device (Mobile) to focus analysis on where your customers are.
Pro move:
- If you serve a local area, filter by Country (or even further by your region if you see it in data) before you export; this makes the brief more targeted.
- If your site has both informational content and products, analyze them separately by filtering Pages containing /blog/ or /product/ (URL-prefix properties make this easier).
Step 5 — Exporting the exact data your freelancer needs
Columns to include:
- Date range comparison (implicit in the export)
- Page
- Query
- Clicks
- Impressions
- CTR
- Average position
- Country
- Device
How to export:
- In Performance > Search results, keep your comparison active.
- Click the Export button (top right).
- Choose Google Sheets or Download CSV.
- If you drilled down into a specific page or applied filters (country/device), the export will reflect that view—note this in your brief.
Simple Google Sheets mapping (paste these as column headers in Row 1):
- Page URL
- Page title (fill in if you want to remind the freelancer of current title)
- Query
- Clicks (current period)
- Clicks (previous period)
- Impressions (current period)
- Impressions (previous period)
- CTR (current / previous)
- Avg. position (current / previous)
- Country
- Device
- Recommended action (to be filled by freelancer)
- Notes
Tip:
- Keep one Sheet per site and create a new tab per reporting period (“GSC_YYYY‑MM_28v28”). This builds a history of changes alongside actions taken.
Step 6 — Share safely: user roles vs. file sharing
Two ways to collaborate:
- Share the exported file: Always do this first. It gives context without granting site access.
- Add a user in GSC: Settings > Users and permissions > Add user.
Roles (as summarized by Mangools):
- Owner: Full control, can add/remove users. Keep this in‑house.
- Full user: Can view all data and use most tools; cannot change user permissions.
- Restricted user: Can view most data with some limits.
Recommended workflow:
- Start with a “Full user” only if the freelancer needs to create annotations or use certain tools; otherwise, “Restricted user” often suffices for viewing reports.
- Set a calendar reminder to review and revoke access when the project ends.
- Avoid sharing your primary Google account; use the built-in “Add user” feature.
Step 7 — Quick triage: which “hurt” pages to fix first
Prioritize pages where a small change can recover clicks quickly.
Quick wins (do these first):
- Title and meta description refresh: If impressions are stable but CTR fell, rewrite the title to match search intent and add a compelling, truthful benefit. This boosts clicks even at the same rank.
- Indexing check: If a page shows zero impressions suddenly, inspect whether it’s noindexed, blocked by robots.txt, or canonicalized incorrectly. Getting it indexable can restore visibility.
Medium lifts (schedule next):
- Content update: For pages that lost clicks and impressions, refresh the content to better answer the query. Add missing subtopics, examples, and FAQs users actually search.
- Internal links: Link from newer or higher‑authority pages to the slipping page with descriptive anchor text. This can help discovery and relevance.
Deep work (plan as projects):
- Information architecture: If many related pages are thin or cannibalizing each other, consolidate into a stronger, singular page and redirect the rest.
- Migrations and redirects: If URLs changed recently, audit redirects and ensure no chains or dead ends.
Why these help clicks (not just rankings):
- Better titles/descriptions increase the odds that the same number of impressions produce more clicks.
- Fixing indexing and internal linking ensures eligible pages actually appear in search results.
- Content that more precisely meets intent can rank more stably and earn sitelinks, which attract clicks.
What to ignore for the first month
- Enhancement details and schema minutiae: Useful later, but they won’t fix a titles/intent mismatch today.
- Deep Core Web Vitals analysis: Site speed matters, but early gains typically come from relevance and CTR improvements. Save lab work for month two.
- Inspecting every URL manually: Start with the Performance report to find the 5–10 pages that move the needle.
- Non‑Search surfaces: The “Discover” and “News” reports apply only to some sites; focus on “Search results” first.
Common beginner mistakes and quick fixes
- Adding the wrong property version: If you added http:// but your site is https://, you’ll miss data. Add and use the correct version or a Domain property.
- Missing www vs non‑www traffic: Again, a Domain property prevents gaps. If you use URL-prefix, add both.
- No data showing up: New sites may not have data yet, and data isn’t real-time. Make sure you’re looking at completed recent periods and that verification is valid.
- Duplicate properties causing confusion: Keep one canonical Domain property for day‑to‑day and use URL-prefix properties only for focused audits.
- Analyzing Discover instead of Search: Ensure you’re in Performance > Search results for web search data.
- Filters left on from a prior session: Clear filters (country/device/page) before running your main export, or document them in your brief.
Time and cost estimates (DIY vs hiring a freelancer)
Time you should budget (DIY):
- Add and verify a property: 10–15 minutes (Domain via DNS may take longer if you need registrar access).
- Submit sitemap: 3–5 minutes.
- Run the clicks‑lost comparison and scan top pages: 10 minutes.
- Export and share the file: 5 minutes.
- Total for your first pass: about 30 minutes.
If hiring a freelancer:
- Ask for a fixed‑scope “GSC Setup + First Performance Export” deliverable that includes:
- Adding the correct property (Domain preferred), verified with screenshots.
- Submitting sitemap(s) and confirming status.
- Running the last‑28 vs previous‑28 comparison, filtered to your country and device mix if relevant.
- Exporting Pages and Queries with the columns listed above.
- A prioritized list of 5 pages with specific recommendations (title/description, content updates, internal links).
- Request a short loom/screencast or screenshots so you can replicate later.
- For ongoing help, define a monthly cadence: one comparison export, triage of top movers, and 3–5 page updates.
Note: Prices vary widely by region and scope. To avoid surprises, give the exact checklist above and ask for a fixed price for setup and a separate fixed price per batch of page updates.
Sample freelancer brief and email (copy‑paste ready)
Subject: GSC setup + clicks‑lost analysis for [YourSite.com]
Hi [Name],
I need a fast Google Search Console setup and a “lost clicks” analysis so we can prioritize fixes.
Scope (please follow exactly):
- Add a Domain property for [yoursite.com] (or confirm mine) and verify ownership. Provide a screenshot of the verified status.
- Submit sitemap(s): e.g., /sitemap.xml or /sitemap_index.xml. Provide a screenshot of “Success.”
- Performance report:
- Report: Performance > Search results
- Date: Compare last 28 days vs previous 28 days
- Metrics: Clicks, Impressions, CTR, Avg. position
- Tabs: Pages (primary), then drill into Queries for each top‑loss page
- Filters: [Country = your main market]; [Device = All or Mobile] — confirm with me
- Export:
- Export both Pages and Queries to Google Sheets
- Include: Page, Query, Clicks, Impressions, CTR, Avg. position, Country, Device
- Name the Sheet tab “GSC_[YYYY‑MM]_28v28”
- Deliverable:
- A prioritized list of the top 5 pages with the largest click losses, with:
- Title/meta suggestions (≤60/≤160 chars approx., written to match intent)
- Content update notes (what subtopics to add, what to consolidate)
- 2–3 internal link targets for each page (URL + anchor suggestion)
- A prioritized list of the top 5 pages with the largest click losses, with:
Access:
- I’ve shared a Google Sheet here: [paste link]
- I’ll add you as a Restricted (or Full) user in GSC after you accept the Sheet invite. Please confirm your Google account email.
Timeline:
- Please deliver within [X business days]. Let me know if anything blocks you.
Thanks, [Your name] [Your role] [Your contact info]
What exactly is “how to use Google Search Console for beginners” asking you to do?
In practical terms, it’s three actions: verify your site, submit a sitemap, and run a comparison in Performance > Search results that reveals winners and losers. Everything else is optional until you’ve identified pages to fix. If you follow the steps above, you’ve already learned how to use Google Search Console for beginners in a way that produces an actionable brief—not just a dashboard snapshot.
Next steps and where to go after your 30 minutes
Monitor weekly:
- Run the same 28‑day comparison once a week and update your Sheet.
- Track whether your title/meta and content updates improve CTR and clicks.
- Watch for new queries emerging on pages you updated; they often reveal gaps to cover.
Signals to use for content work:
- Queries with high impressions but middling CTR: improve titles, add FAQ sections that match those queries.
- Queries you almost rank for (average position roughly on the cusp of page one): small on‑page and internal link improvements can push them over.
- New topics/queries you don’t cover yet: add a focused article or guide that targets the exact intent.
If you’d rather outsource the content lift:
- For help understanding how Google’s AI Overviews choose which sites to cite, see this practical explainer: How AI Overviews work — https://www.competitaurus.com/how-ai-overviews-work
- If you want consistent, topic‑matched articles published without extra tools, this overview lays out a simple stack you can use instead: Replace SEO tools with a streamlined process — https://www.competitaurus.com/replace-seo-tools
- And if you prefer a service to research, write, publish, and promote articles daily (with built‑in backlinks), Competitaurus can handle it end‑to‑end: SEO articles on autopilot — https://www.competitaurus.com/ and topic‑matched backlinks — https://www.competitaurus.com/get-backlinks
According to Google’s own guidance, Search Console is free to use once you verify ownership. Coursera’s primer and beginner guides from Moz and Yoast all echo the same idea: start simple, then go deeper. With a clean setup, one clicks‑lost report, and a clear export, you’ve already covered the essentials of how to use Google Search Console for beginners—without getting lost in the interface.
Key reminder: repeat this small loop each week—verify > compare > export > act. That’s how small businesses turn GSC from a passive dashboard into a steady flow of practical actions.
Frequently Asked Questions
How long after verifying my site will Google Search Console show data?
You can see data only after verification, but Search Console data isn’t real‑time. For active sites you’ll often see historical data right away, while fresh search data and tools may take a few days to populate. New sites or recently verified Domain properties can take several days for consistent data to appear.
Should I choose Domain or URL-prefix property for my small business site?
Choose a Domain property when you want one unified view across all subdomains and protocols (http/https, www/non‑www). Use URL‑prefix only for quick, section‑specific audits (for example, /blog/); it’s faster to verify but easier to miss other site versions.
I see no data after verification — what should I check first?
First confirm verification succeeded (Settings > Ownership verification) and that you added the correct property version (use Domain to avoid www/http mismatches). Also ensure you’re viewing Performance > Search results with no restrictive filters (country/device/page) and allow a few days for new data to appear.
Exactly which columns should I export for a freelancer to act on?
Export these columns: Page URL, Query, Clicks (current and previous period), Impressions (current and previous), CTR (current/previous), Avg. position (current/previous), Country, Device. Add columns for Page title, Recommended action, and Notes so the freelancer can deliver clear, prioritized tasks.
How do I export GSC data to Google Sheets (step-by-step)?
Open Search Console > Performance > Search results, set your date comparison (e.g., last 28 days vs previous period), select metrics (Clicks, Impressions, CTR, Position), apply any filters, then click Export (top right) and choose Google Sheets. If you prefer CSV, choose Download CSV and upload or import it into Google Sheets.
What user role should I give a freelancer and how do I revoke access?
Share the exported sheet first; then add the freelancer in GSC via Settings > Users and permissions. Grant Restricted/Full user depending on needs (Restricted for view only, Full if they must use most tools). Revoke access later from the same Users and permissions screen by removing their account.
How long will setup and the first analysis take if I do it myself?
Budget about 30 minutes total: 10–15 minutes to add and verify a property (DNS verification can take longer), 3–5 minutes to submit a sitemap, ~10 minutes to run the clicks‑lost comparison and scan top pages, and 5 minutes to export and share the file.
How much can I expect to pay a freelancer for a one-off GSC audit and export?
Prices vary by region and expertise; to avoid surprises ask for a fixed‑scope deliverable (Domain setup, sitemap submission, 28v28 Performance export, Sheets export, top‑5 prioritized recommendations). Freelancers often charge a fixed fee for this concise task rather than an open hourly rate—request a firm quote against the exact checklist.
What is a sitemap and how long until Google uses it?
A sitemap is an XML file listing the URLs you want Google to crawl and index. After you submit it in GSC, Google will read it and report a “Last read” timestamp; indexing is not immediate and can take days to weeks depending on site size, change frequency, and crawl budget.
Which GSC reports should I ignore in month one so I don’t get overwhelmed?
Ignore Enhancement details (schema/debugging), deep Core Web Vitals lab analysis, and manually inspecting every URL. Focus month one on Performance > Search results to find the handful of pages that actually move traffic.